Evergreen garlands add a romantic, festive, and graceful touch to the Christmas holiday season.
Their colour, texture, and fragrance signal that the holidays have arrived.
It’s easy and cost-effective to make an evergreen garland. And if you make your own, you can customize it to suit your décor and make it completely eco-friendly!
This blog will include two assembly options that work well. One is a traditional construction and the other is completely compostable.
Let’s dig in and talk about how to make an evergreen garland. We’ll talk about the supplies needed for a fresh evergreen garland, how to make the garland step by step, and how to care for an evergreen garland to keep it looking great.
Materials Needed for a DIY Fresh Evergreen Garland
The materials needed for a fresh evergreen garland are uncomplicated and simple to find, and your own backyard is the first place you can start looking, which will also help to keep your budget down.
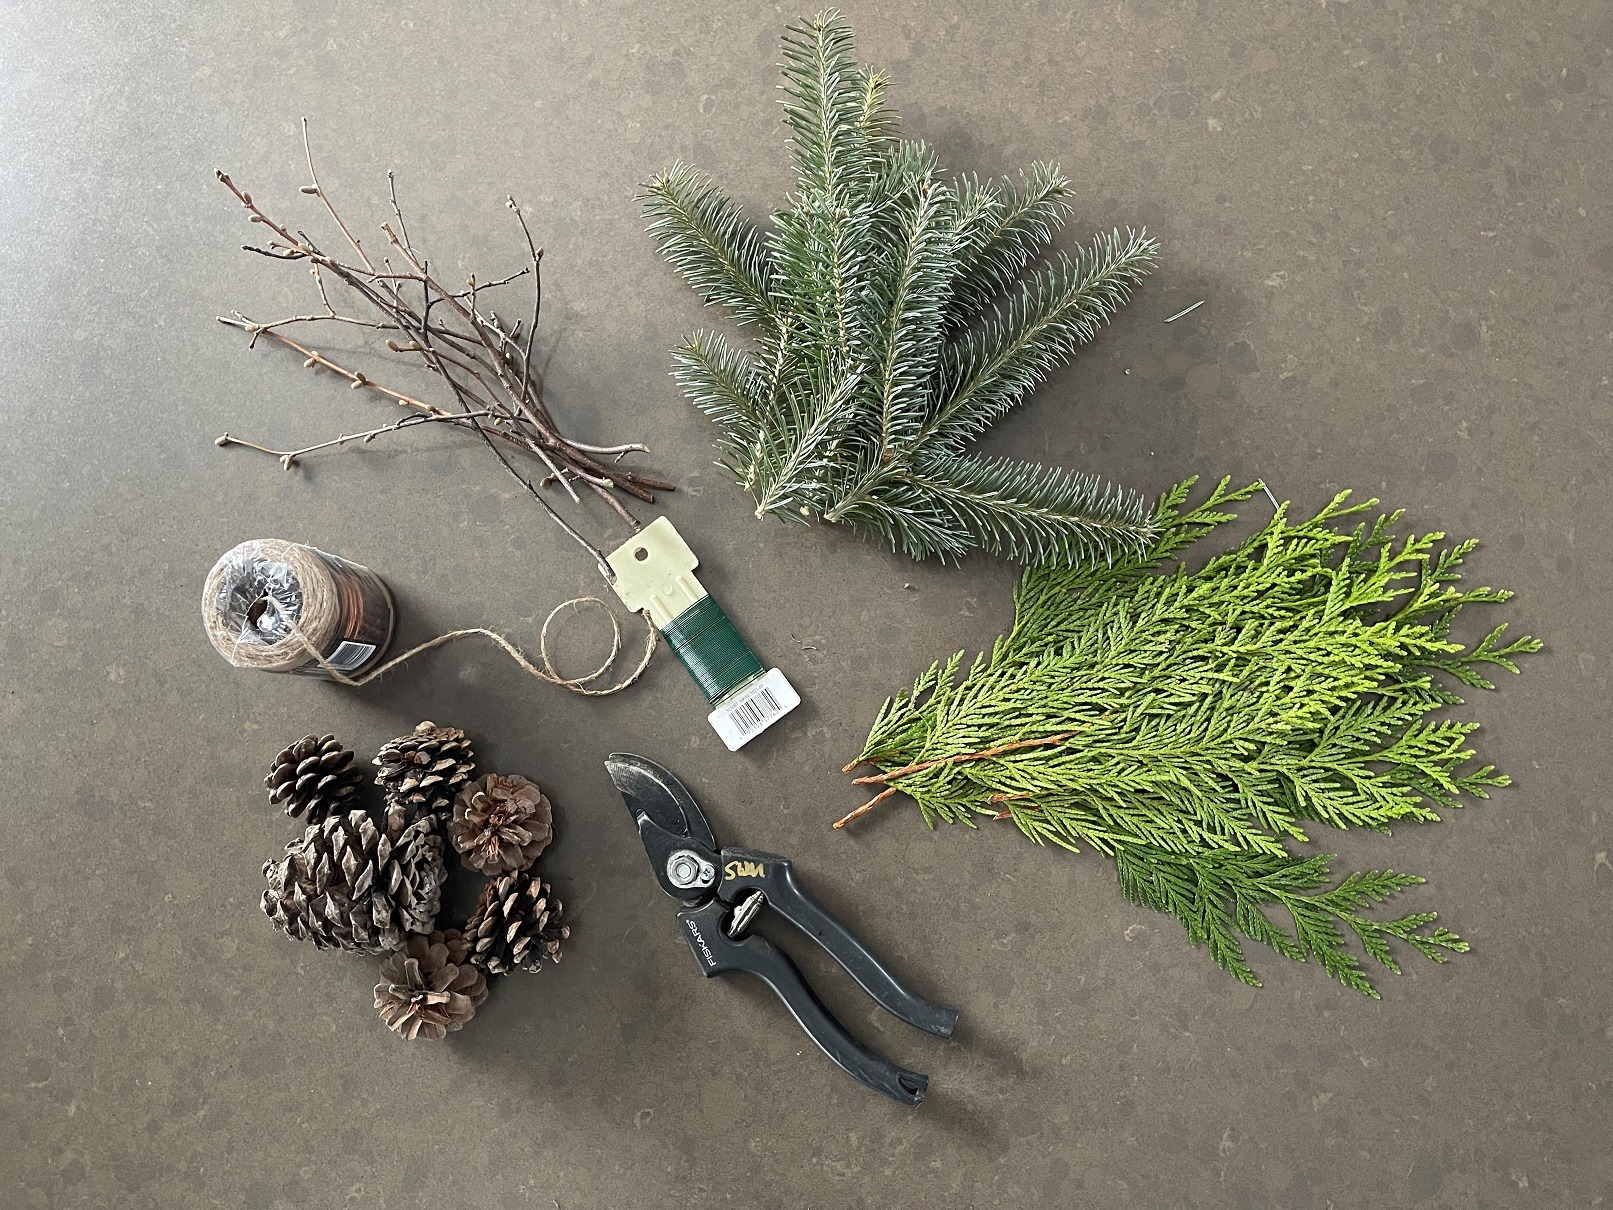
Supply List for an Evergreen Garland:
- A variety of fresh greenery
- Medium to heavy-weight jute
- Jute or paddle wire
- Sharp, clean hand clippers
- Optional Decorations
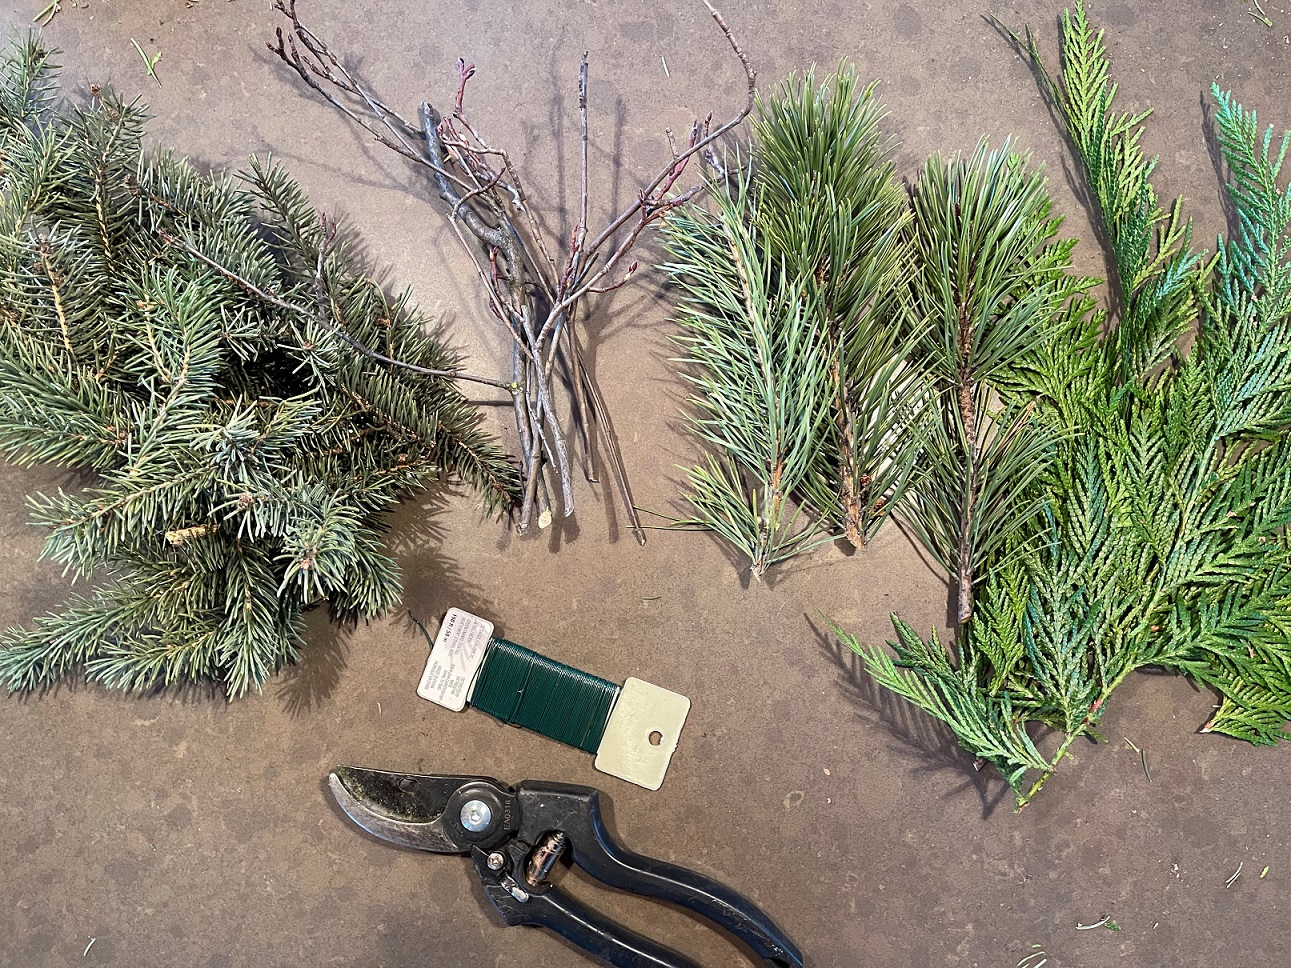
Gather a Variety of Fresh Greenery
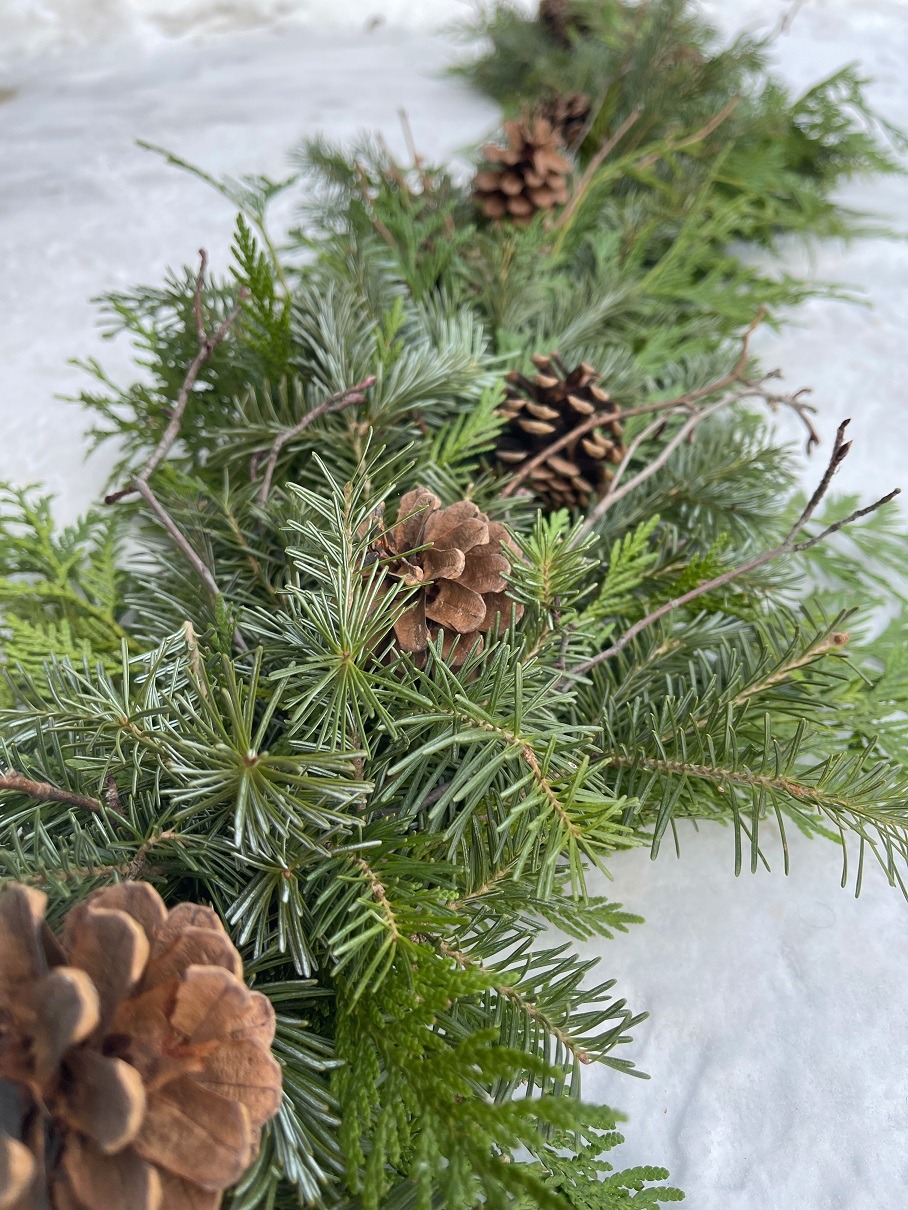
Sprigs of Cedar, Pine, Fir, and Saskatoon sprigs were the foundation for my garland. I chose Pine for a long needle texture, fir for shorter needles and fragrance, and Saskatoon branches for a rustic look. Fir adds fragrance and Cedar contributes an easy-to-use texture.
All of these greens were from my backyard, except for the cedar I bought at a local garden center.
Try to collect 4-5 different kinds of greenery that are placed together in individual bundles, and use what you have available in your area.
Have enough of each type of foliage to use for the entire project so that it will have a unified look. Other great additions are small branches, twigs that have dried berries, and pinecones.
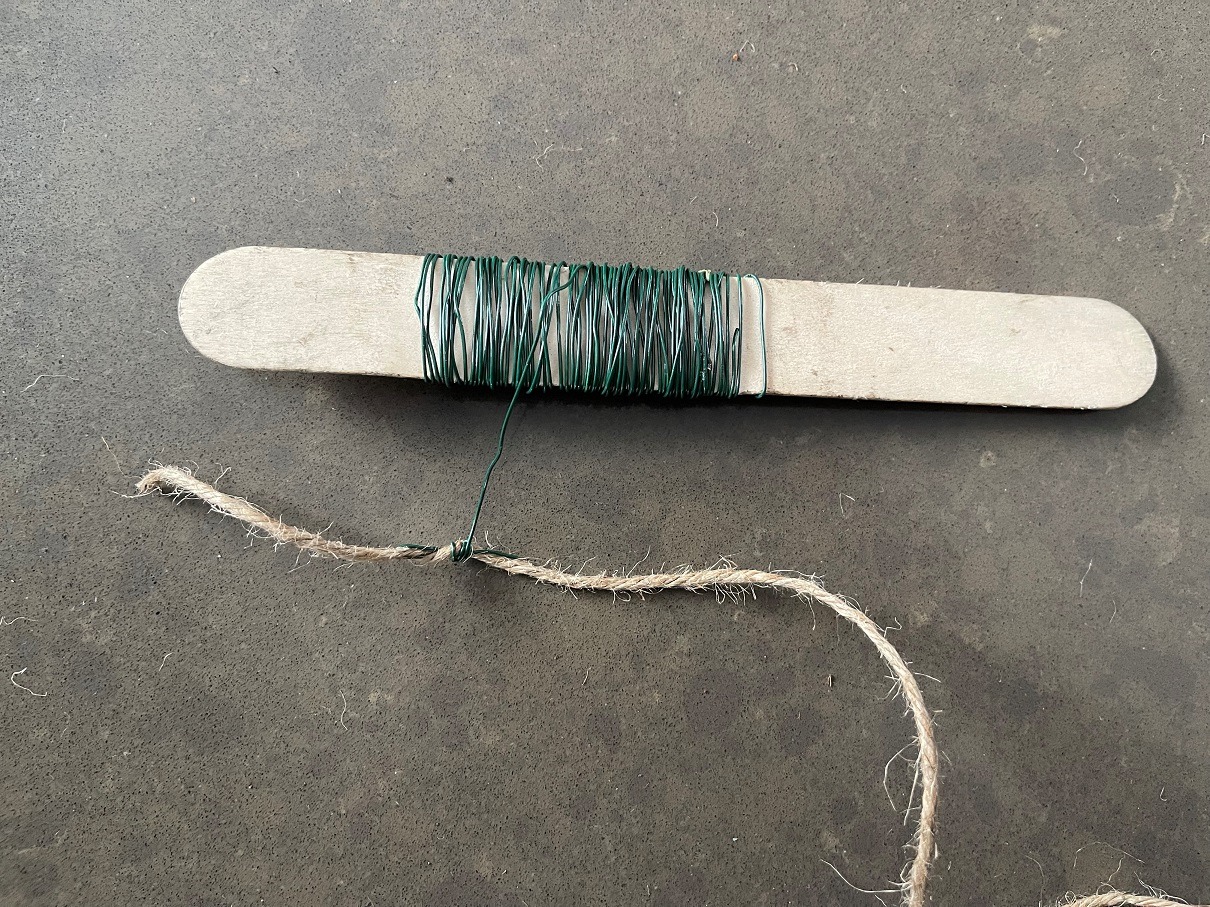
Jute and Paddle Wire
You will need a piece of medium or heavy-weight jute the desired length of your garland to attach the evergreen bundles.
A spool of medium-weight jute to attach the bundles or 22 Gauge paddle wire is also needed for attaching the foliage bunches.
Paddle wire is a fine green wire wrapped on a small plastic panel that is easy to wrap and pull tightly around the bundles.
Jute can be found in hardware stores, dollar stores, and paddle wire at craft stores.
Check that you can pull the jute tightly without it breaking and purchase it in a form that can be easily handled as it circles the evergreen bundles in this project.
Hand Clippers
Sharp, clean hand clippers are required to collect greenery branches and to trim the sprigs as you construct the wreath.
Additional Decorations
If you would like to decorate the garland, collect items like ribbons, bows, pine cones, or any other ornaments you will need. Use things that show off your unique creative style or décor.
Step by Step Instructions for Making an Evergreen Garland
It’s simple to put a garland together!
Garlands are a collection of small greenery bunches of fresh evergreen foliage attached to a wire or jute string guide.
Here we go! Each step has a corresponding photo:
Step 1: Precut the Branches You Have Collected
Cut the branches into 15-20 cm (6-8″) pieces and organize them into separate piles to make your building process smooth and efficient.
Step 2: Measure out a Length of Jute
I measure out a length of jute that is just a little longer (.5m or 1.5′) than the desired finished length of the garland just to give me a little wiggle room.
To get the garland started, I secure the wrapping jute or paddle wire 5 cm (2”) from one end.
Position the wire or jute underneath the guide string and to the right or left side. I positioned it to the right in the photos because it was the easiest for me.
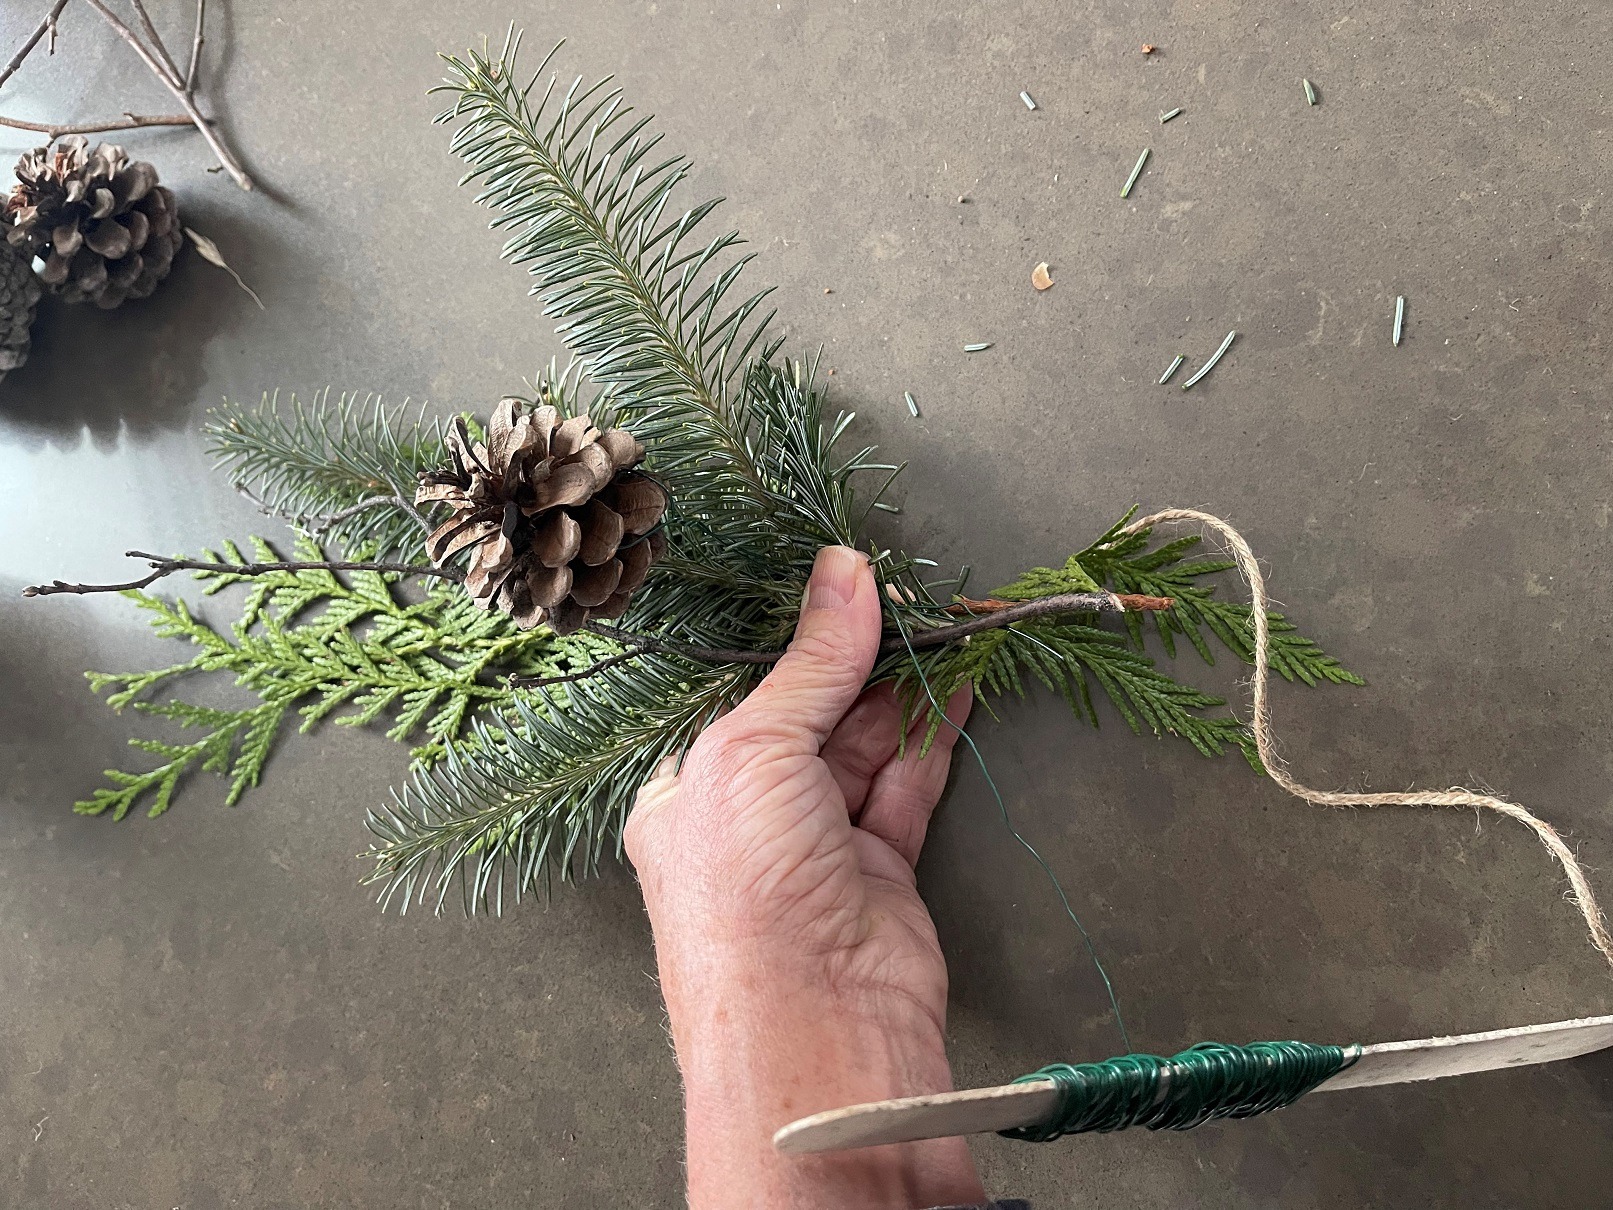
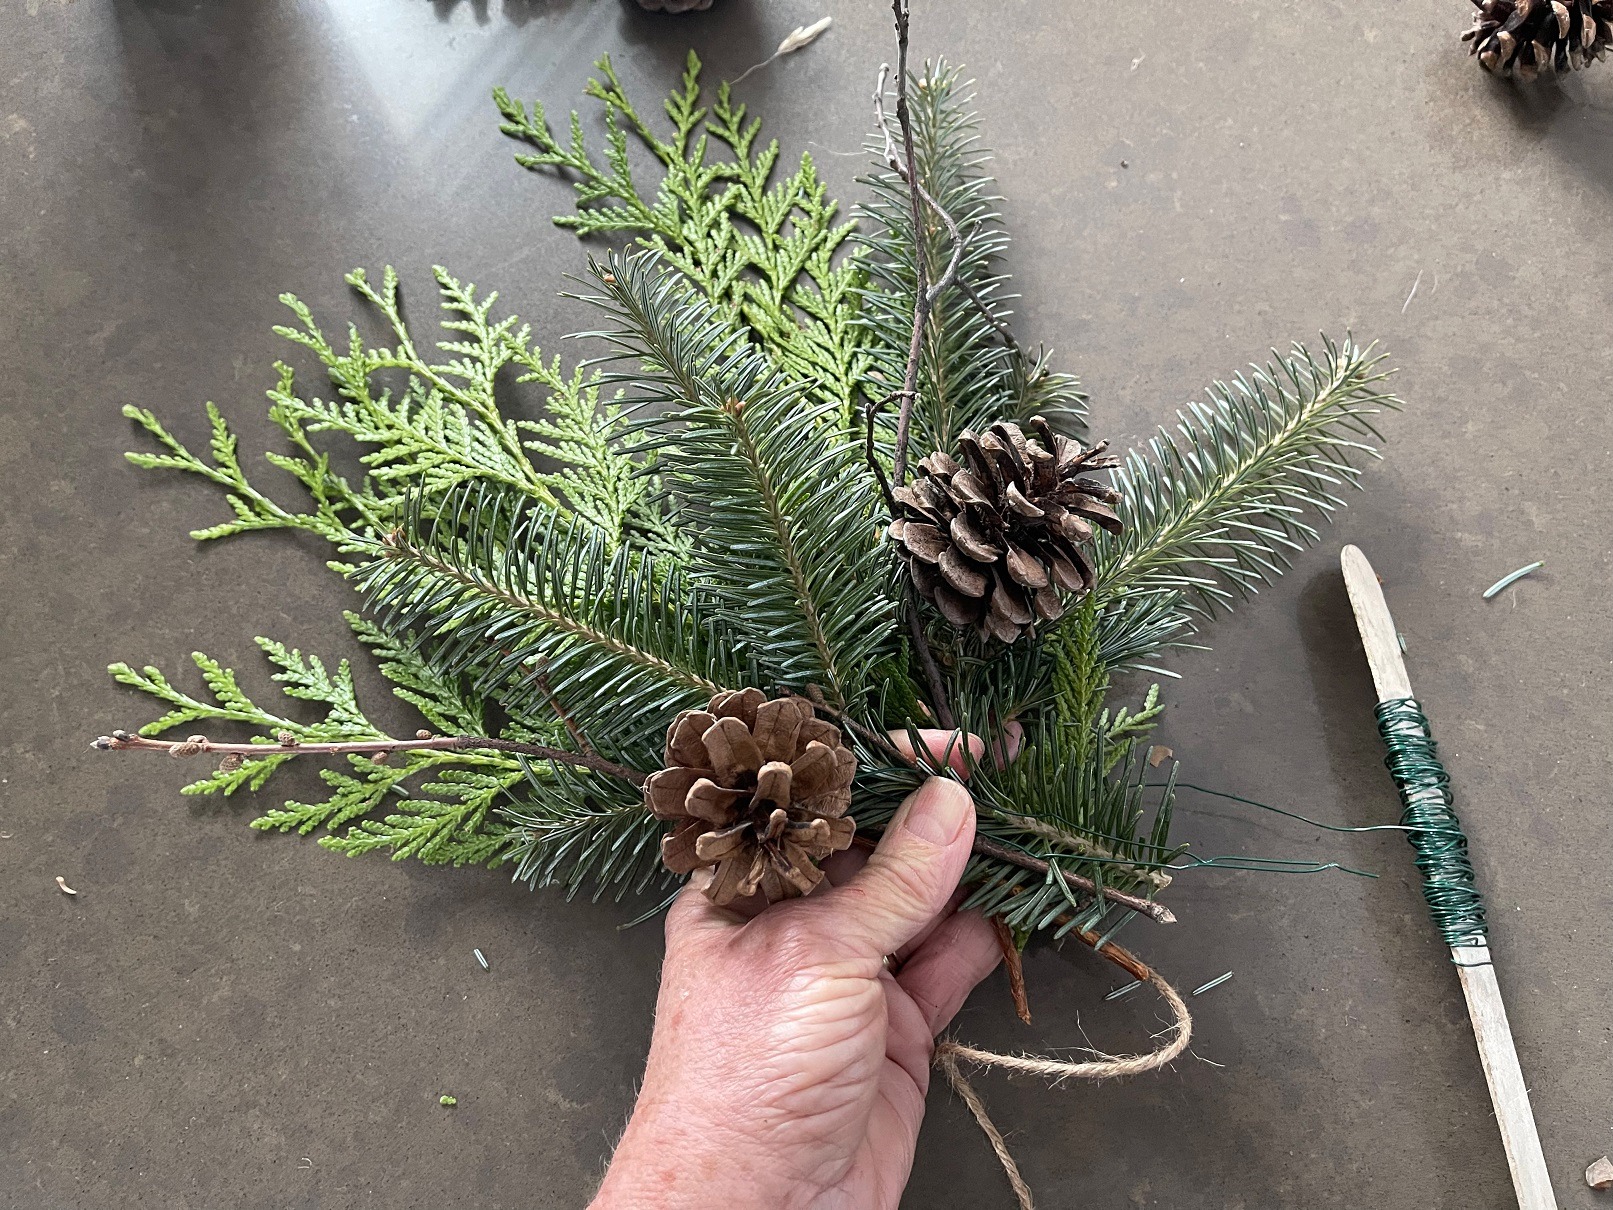
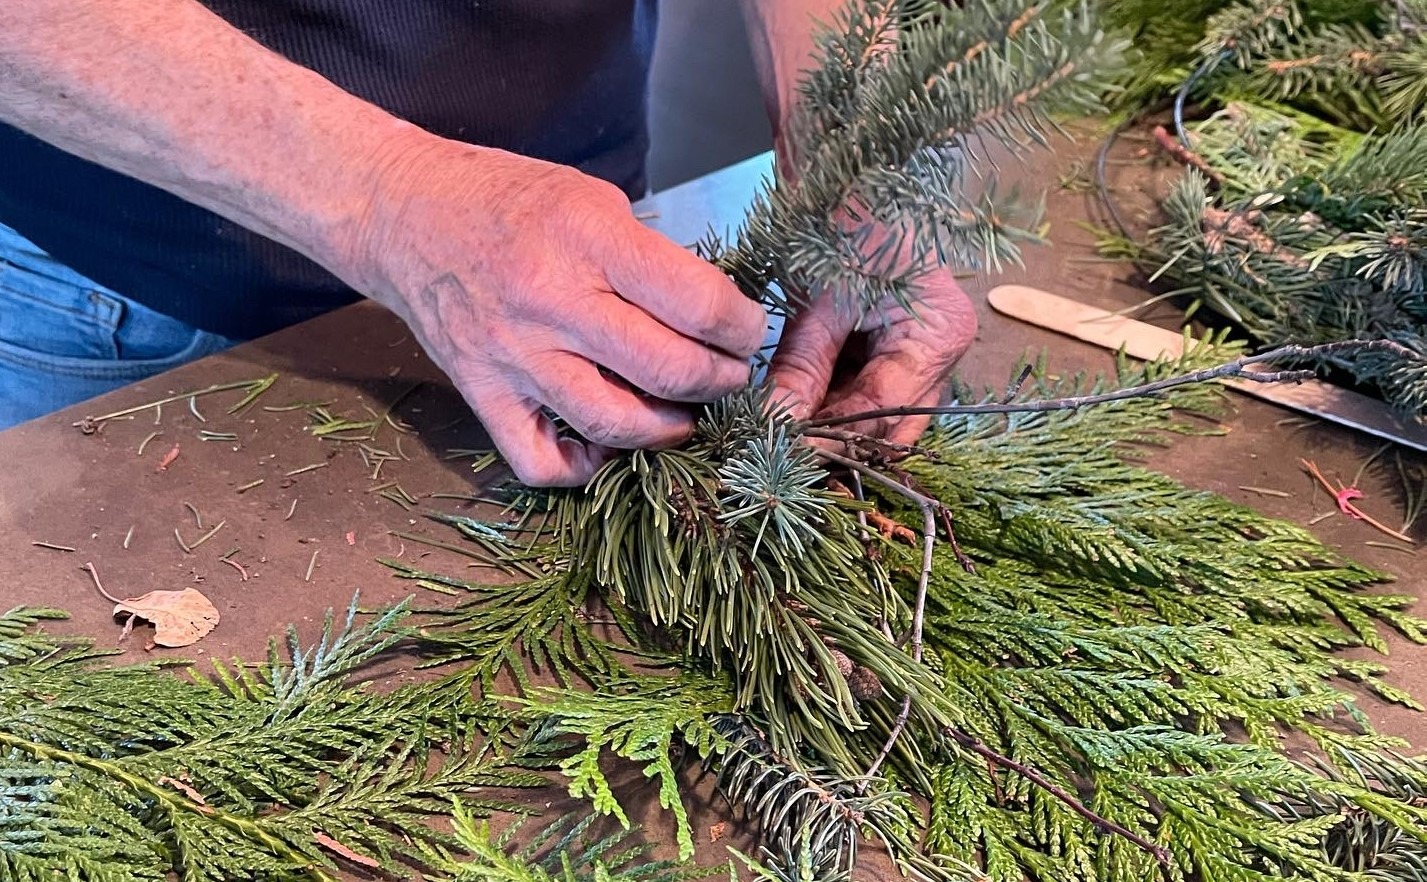
Step 3: Make Individual Greenery Bundles as You Create the Garland

I layered Cedar on the bottom of the bundle and arranged the Pine, Fir, Saskatoon branches on top, depending on how they were shaped. Once and a white I would add in a pinecone.
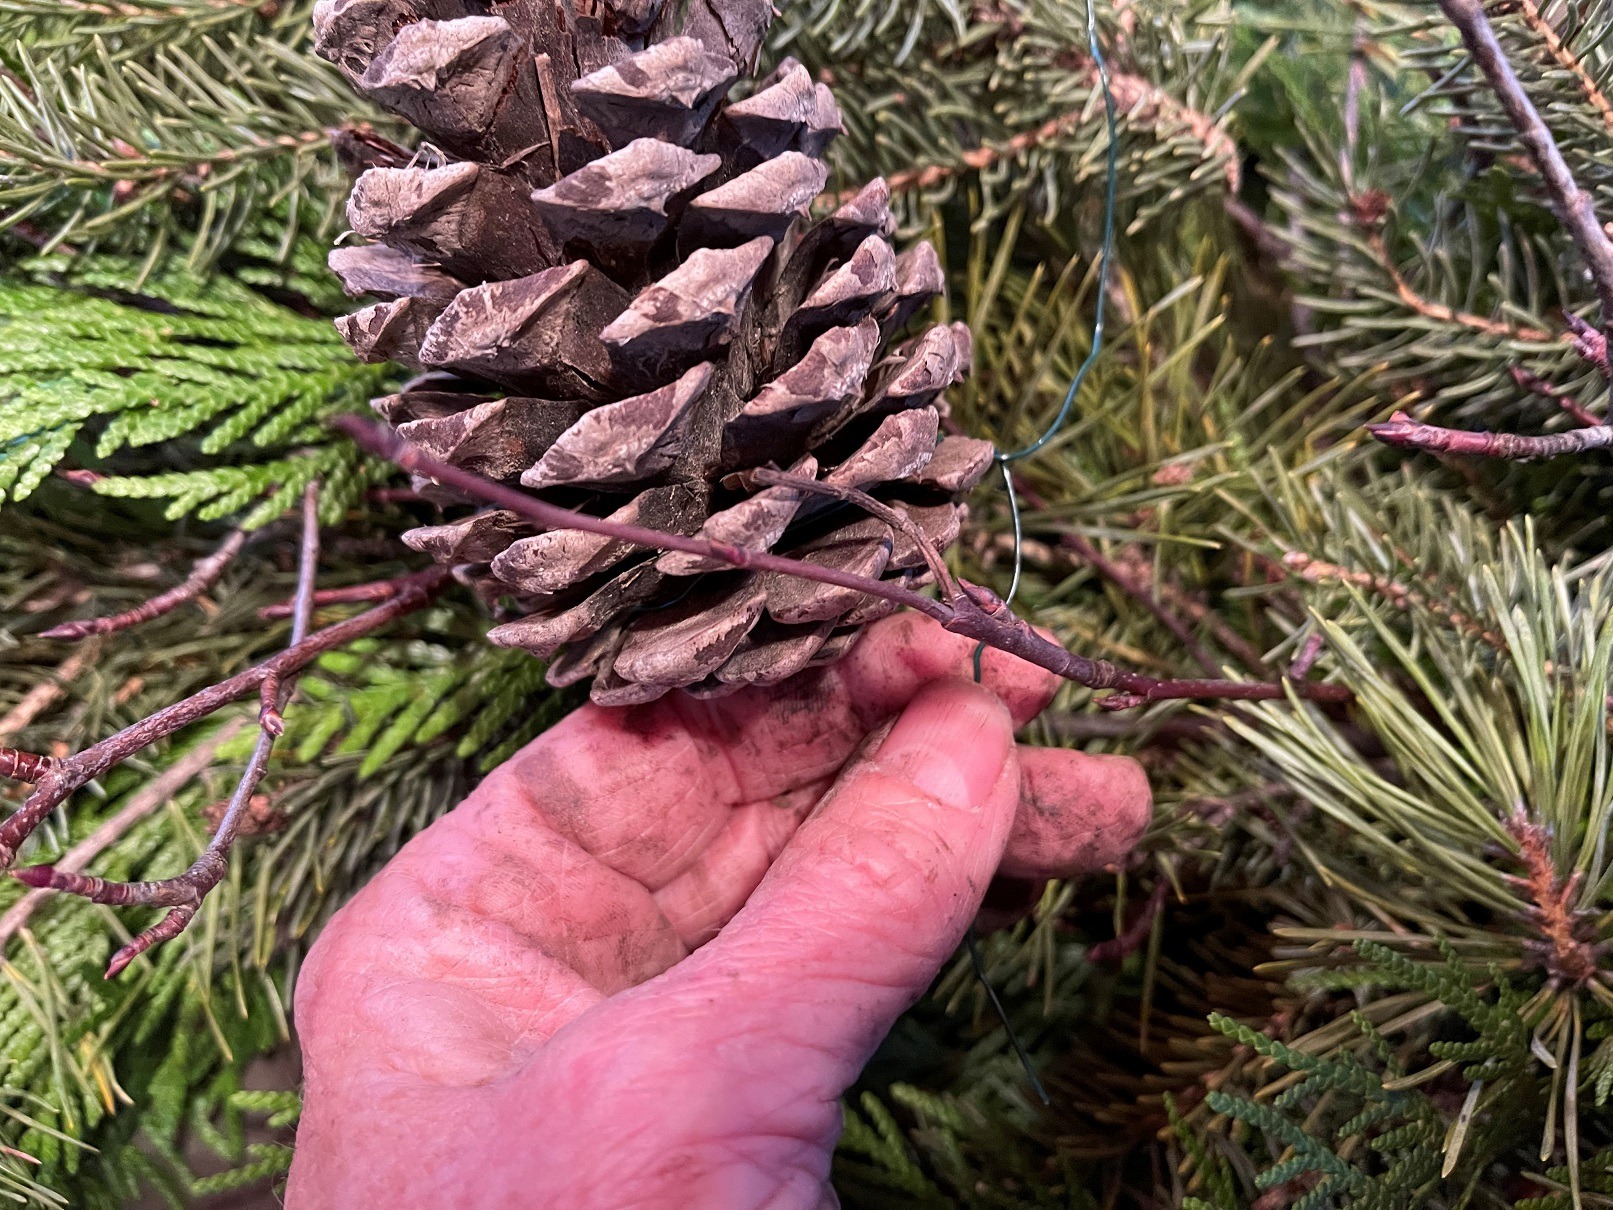
Pinecones can be easily added into the bundles by tying jute or paddle wire around the bottom layer of the cone to create a ‘stem’.
Step 4: Attach the First Bundle to the Jute Guide String
Place the first bundle on the garland guide & secure it by wrapping the paddle wire (or jute) around the bottom 1/3. Wrap it around 3 times.
Pull your securing material tight.
Always end with the paddle wire or wrapping jute underneath and to the side of the guide string.
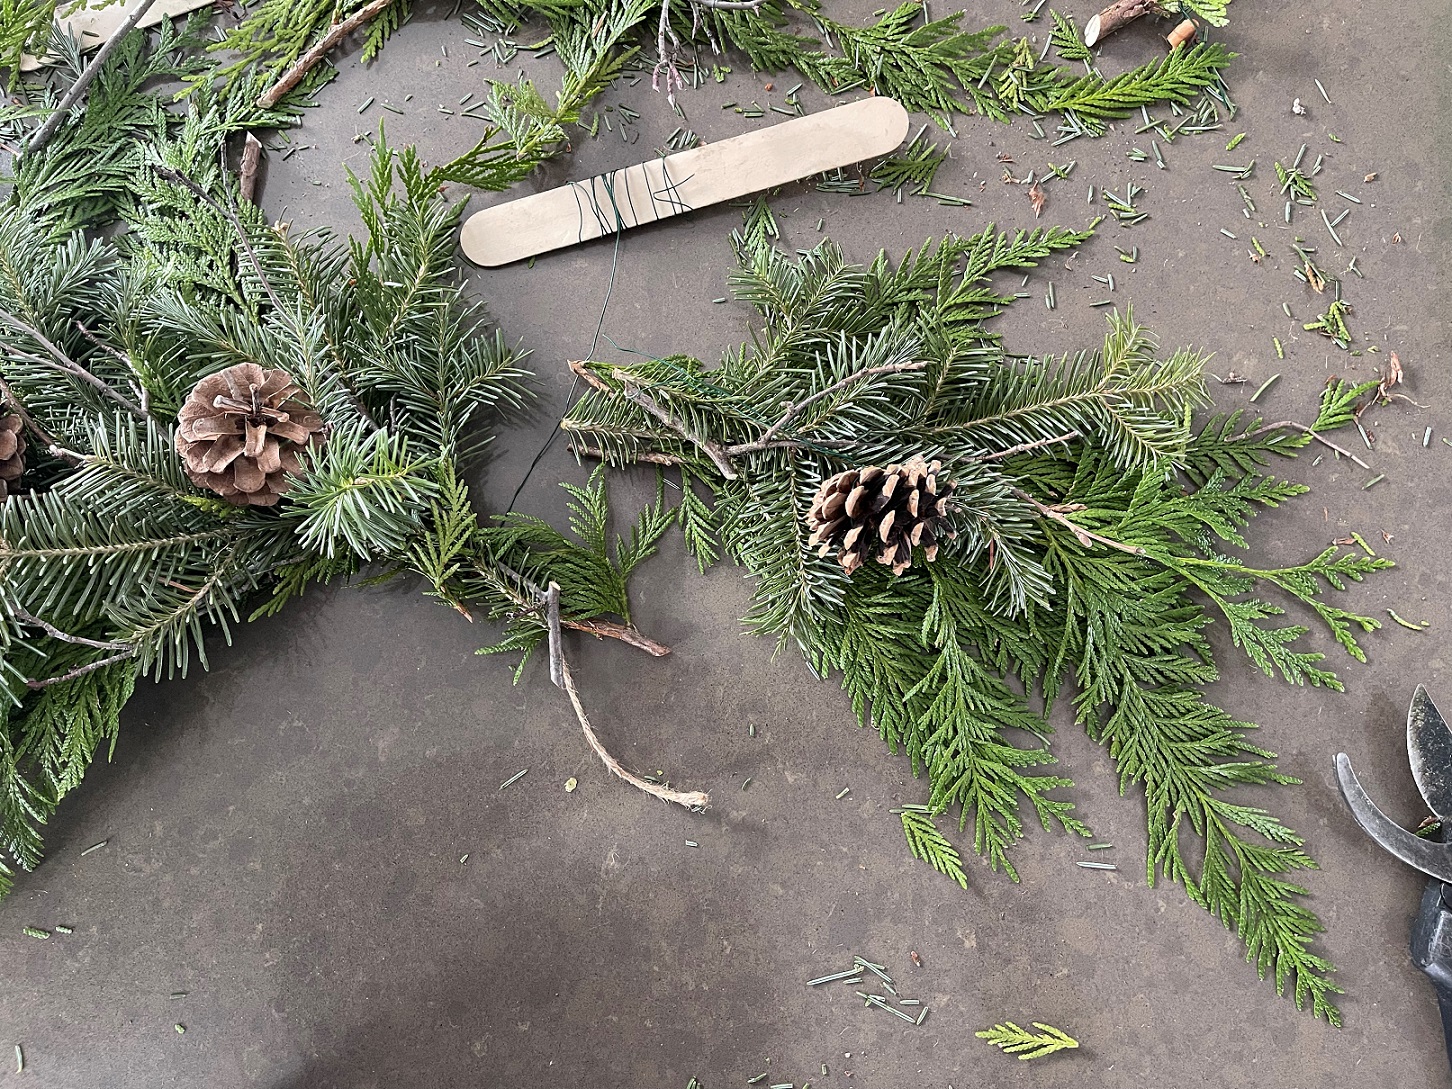
Step 5: Angle the Second Bundle
Angle the second bundle diagonally to the left, covering the wire or jute wrapping of the first bunch.
Secure the bottom 1/3 of the bunch, wrapping it 3 times and pulling it tight. You will also be surrounding a portion of the first bunch in this.
Step 6: Keep Layering the Bundles
Continue to layer and alternate the bunches right, left, right, left and secure as above until you are near the end of the guide string or wire.
Step 7: Finish off the Garland
When you arrive at the end of the garland, you can finish it with all the bundles facing one direction, or you can place the last bunch in the opposite direction.
If the last bundle is attached in the opposite direction, there will be a gap that needs filling. Tuck varied branches into the garland to make it look natural and secure the paddle wire or jute tightly at the back of the garland.
Step 8: Review the Garland
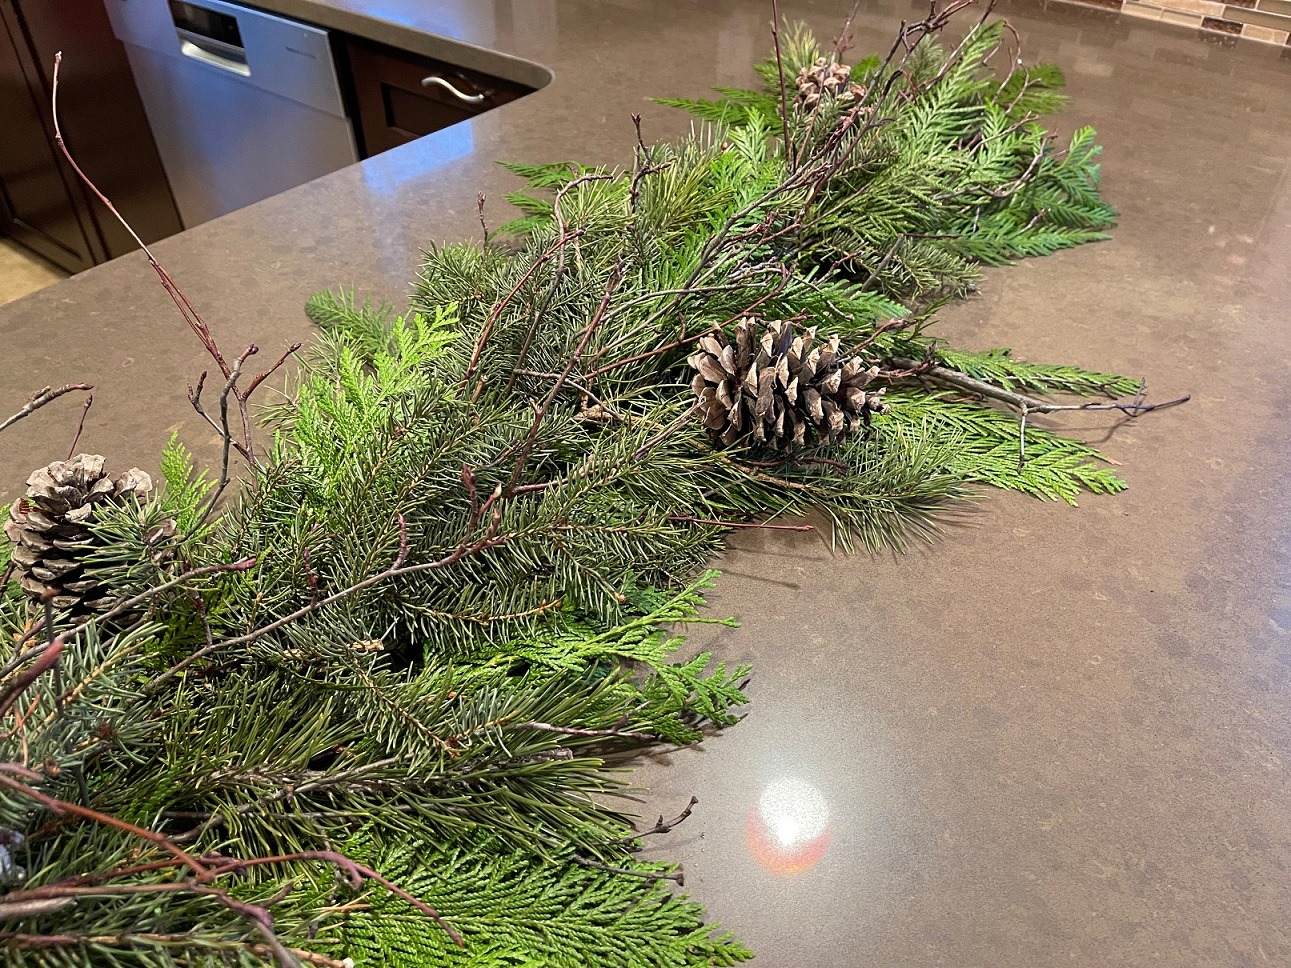
Step back from your garland to see which branches need trimming or where components need to be added to fill areas needing more bulk.
Step 9: Decorate the Garland
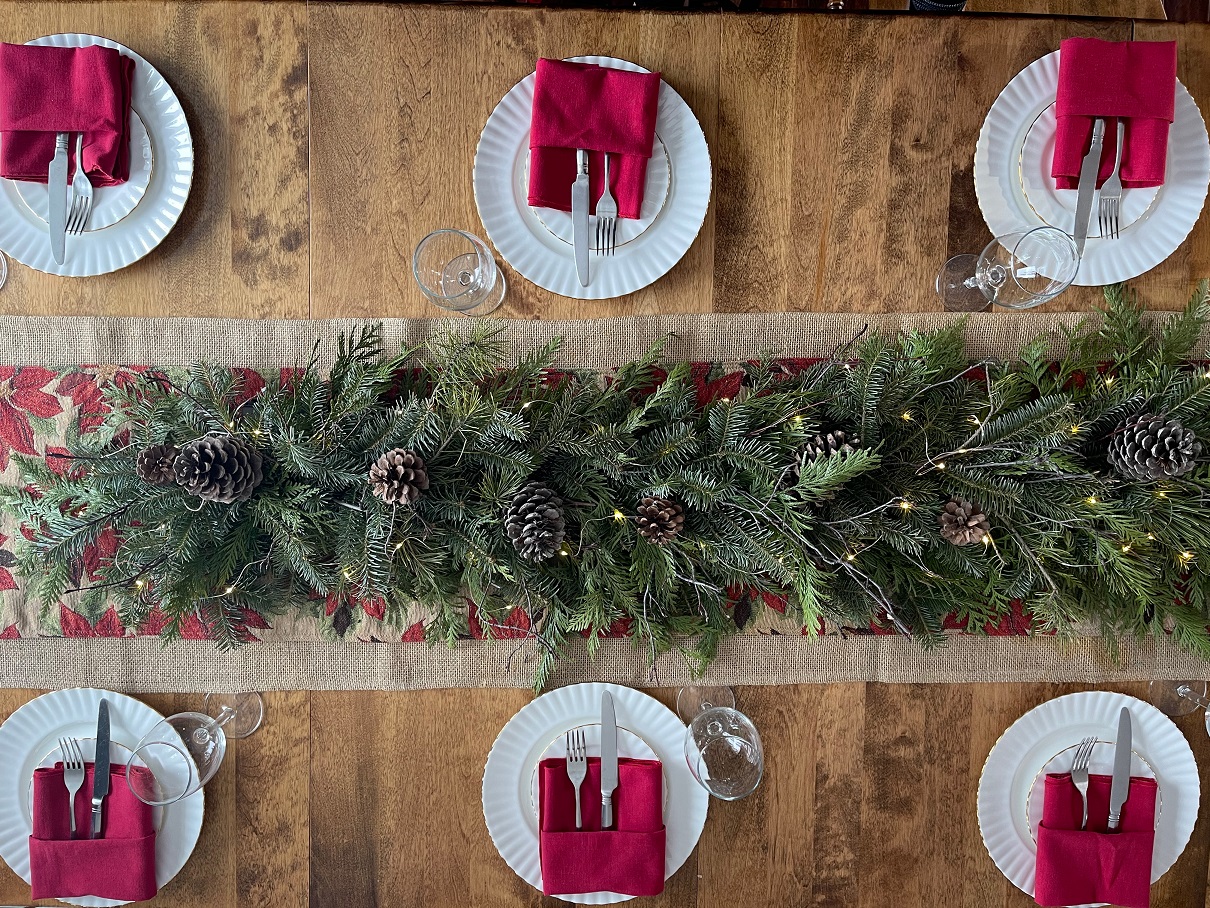
Plain garlands are beautiful, but if you like, let your creativity flow! Add your own touch and match your theme decor, if you wish.
Garlands can be decorated with sprays of red, gold, and add some sparkle with twinkle lights.
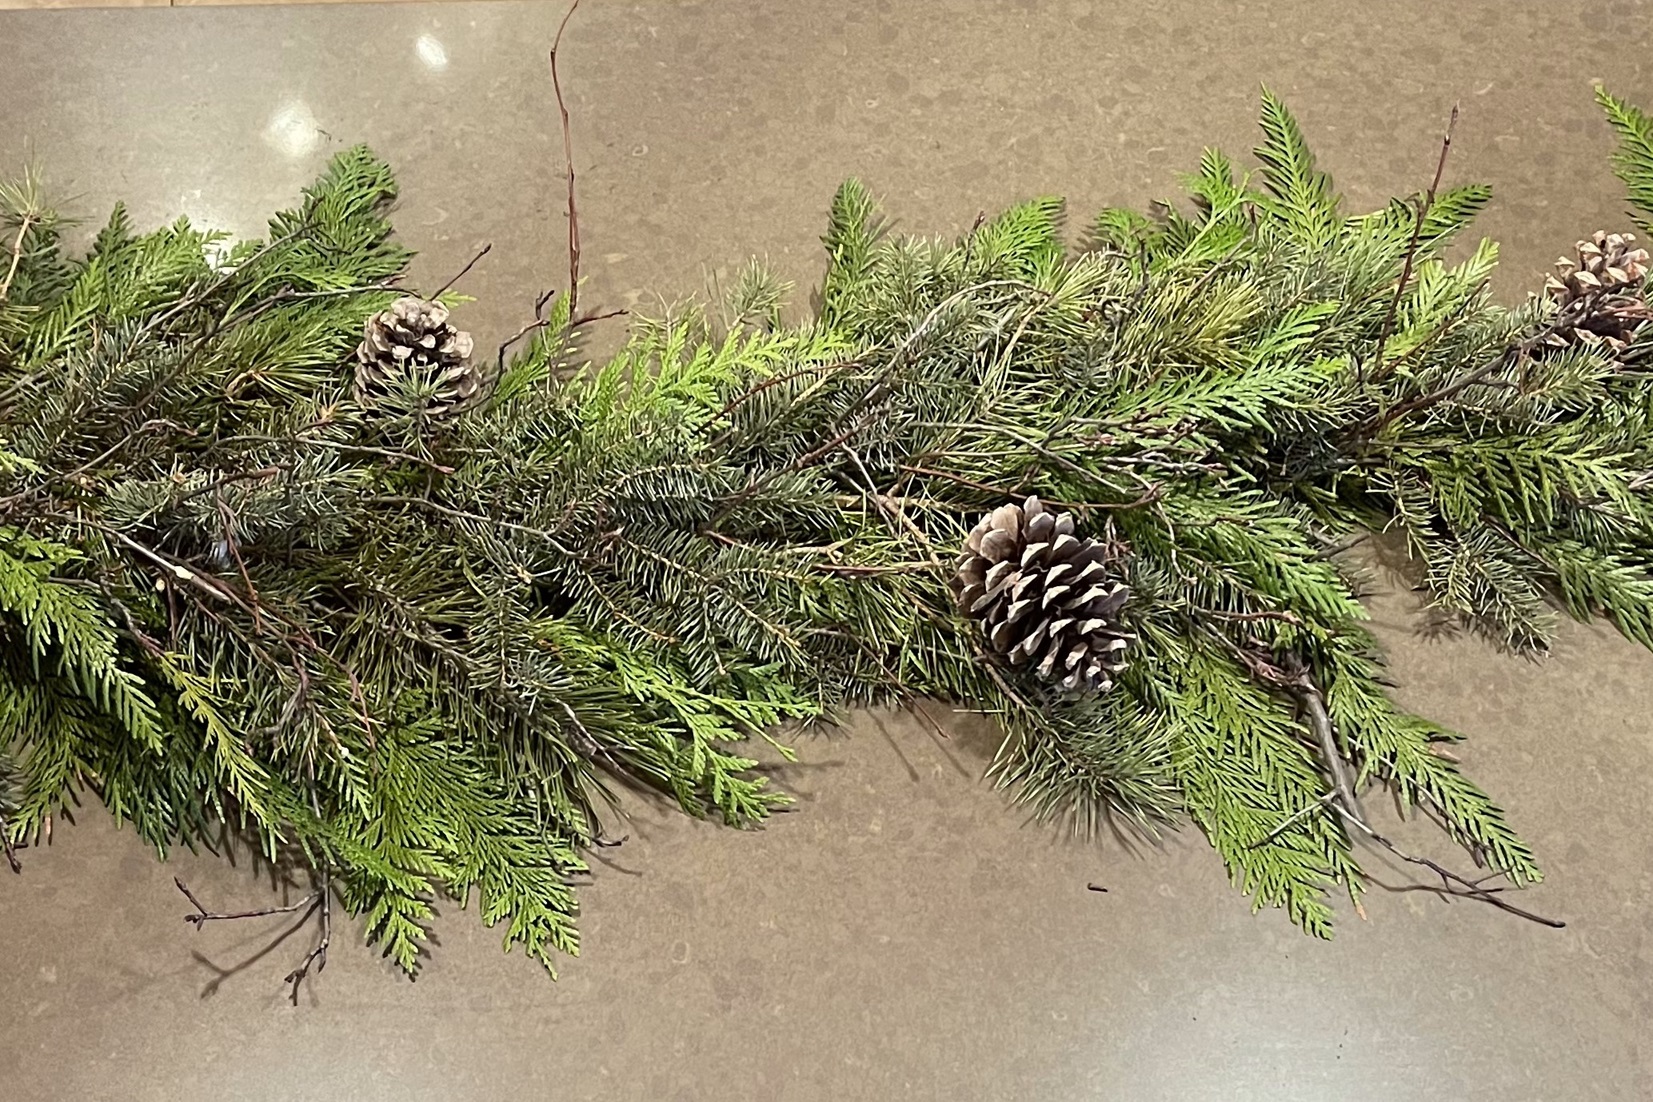
Step 10: Place and Enjoy Your Garland!
Liven up any space with your beautiful, fresh garland!
Garlands look fantastic indoors and out gracing tables, benches, banisters, fireplace mantles, and over doorways.
How to Keep Your Fresh Garland Looking Great
How long fresh evergreen garlands last depends on where they are displayed.
Fresh greenery lasts longer outdoors in a cool environment compared to indoors where the climate is warm and dry.
Outdoor garlands need no care in locations where the temperatures stay below freezing and can last for months.
If you live in a warmer climate that stays above freezing, garlands will need regular misting every few days.
Indoor garlands will usually last 7-14 days.
One way to extend the life of your garland is to store it outdoors until you need to feature it.
I typically build my garlands at the beginning of December and leave it outdoors (cold is our super-power in central Alberta) and bring it in for events.
I bring it in permanently around December 23.
If you don’t have a cold outdoors, a cold room, garage, or cooler basement are good alternatives.
Related: How to Select, Use, and Care for Live Christmas Greenery.
Be Inspired!
I hope that this encourages you to pull out your supplies and make a garland of your own. Garlands give a festive and elegant touch to any surface they cover, and they’re so easy to do!
Wishing you and yours joy, and the best that this festive season has to offer!
©Sharon Wallish Murphy ©Gardening with Sharon