Seeing evergreen wreaths pop into the landscape always tugs nostalgically at my heartstrings as the Christmas holiday season draws near.
Have you ever wondered how to make your own fresh evergreen wreath? It’s easier than you think.
This blog will describe two options for wreath construction, a traditional assembly with a wire form and an eco-friendly version with completely biodegradable components.
Let’s dig in and be creative!
Materials Needed to Construct a DIY Evergreen Wreath
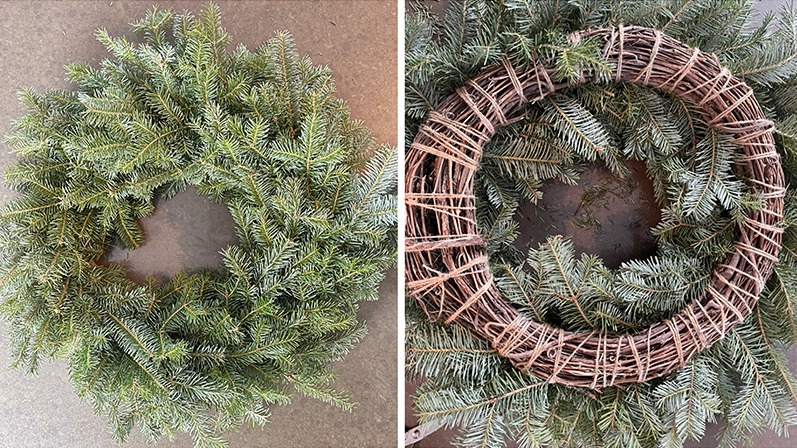
Supplies for an evergreen wreath are simple to find and readily available. You can start this project in your backyard, which will also keep your budget down.
Gather a variety of fresh greenery.
Sprigs of pine, fir, and cedar are the foundation for my project, but it really doesn’t matter which ones you have, the goal is to have an assortment of textures, colours, and shapes. This is what gives wreaths their character.
Other great additions are small branches, twigs that have dried berries, and pinecones. Try to have at least four different kinds of greenery. Whatever you choose, have enough of each type so your combinations will be consistent for the whole wreath.
In the photos, I used Red Cedar branches for a flat light green base, Scots Pine with long needles, Balsam Fir with shorter needles for balance and fragrance, and Saskatoon twigs to lend a rustic look.
If you are making a 14″ wreath, collect enough of each type of foliage to make 14-18 bunches, so you will need 28-36 pieces of each kind of greenery that are 15-20 cm (6-8″) long, just in case you use more than one sprig of each type in the bundles.
You will need a wreath frame to attach greenery bundles to.
I recommend using a wreath frame that is at least 14″ across. Forms smaller than 14″ can result in a wreath that doesn’t have a middle hole because the greenery fills it. If you want to make a larger wreath, that will also work; you just need to adjust your greenery amounts.
Wreath forms can be made of metal and reused year after year, or grapevine wreaths are an environmentally friendly option.
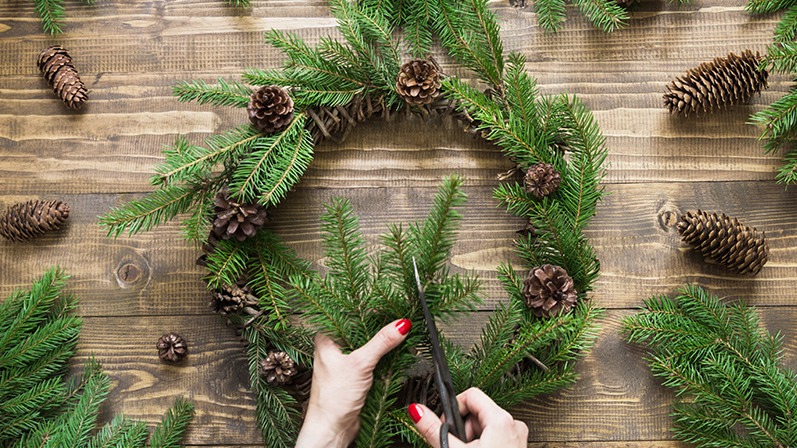
You will need a securing material to attach the bundles to the wreath frame.
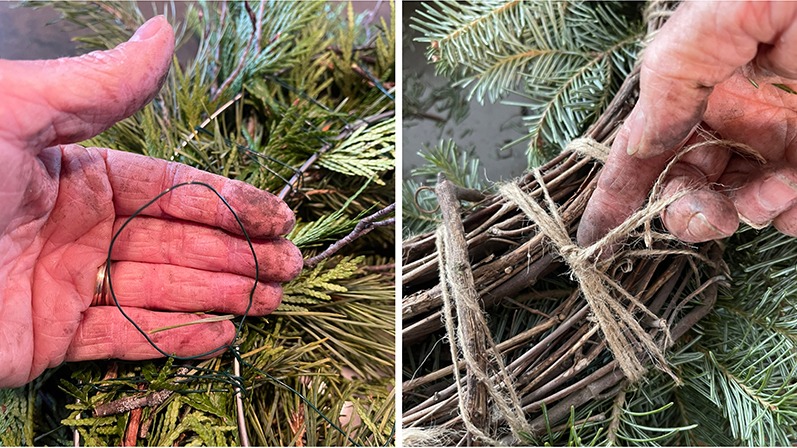
Paddle wire is a fine green wire wrapped on a small plastic panel that is easy to wrap around the frame and pull tightly. Paddle wire can be found at craft stores and online.
22 Gauge paddle wire or medium-weight jute both work well.
Medium-weight jute is an eco-friendly option for fastening the greenery bundles. Check that you can pull the jute tightly without it breaking and purchase it in a form that can be easily handled as it circles the wreath form.
Sharp, clean hand clippers.
Hand are needed to collect greenery branches and to trim the sprigs as you construct the wreath.
You could also incorporate decorations.
Decorations like ribbons, bows, pinecones, or other ornaments can be used to dress up your wreath. Use things that match your décor and highlight your creative style.
How to Make a Fresh Evergreen Wreath Step by Step
Putting a wreath together is simple! A wreath is a collection of little bundles of greenery anchored to a wreath frame.
Here’s how to do it, each step has a corresponding photo:
Step 1: Precut the branches you have collected into 15-20 cm (6-8″) pieces and organize them into individual piles to organize your building process and make it quicker.
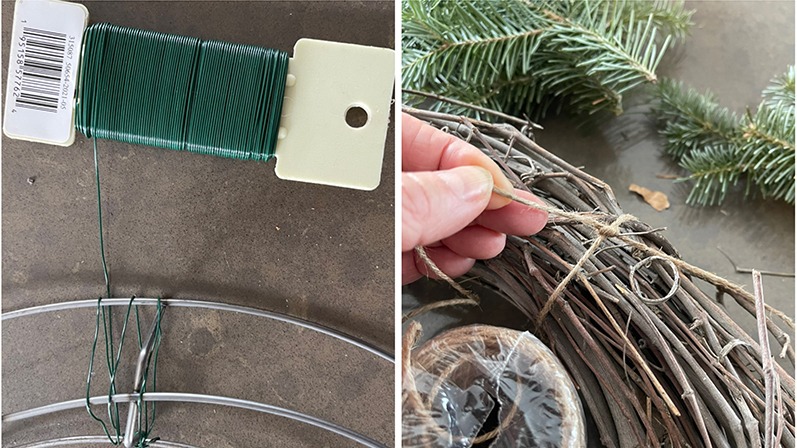
Step 2: Secure the paddle wire or jute to the wreath frame. Attach the jute with a knot and fasten the paddle wire by wrapping it a few times around the form and tightly twisting the wire.
Position the wire or jute underneath the frame and lying off to the side.
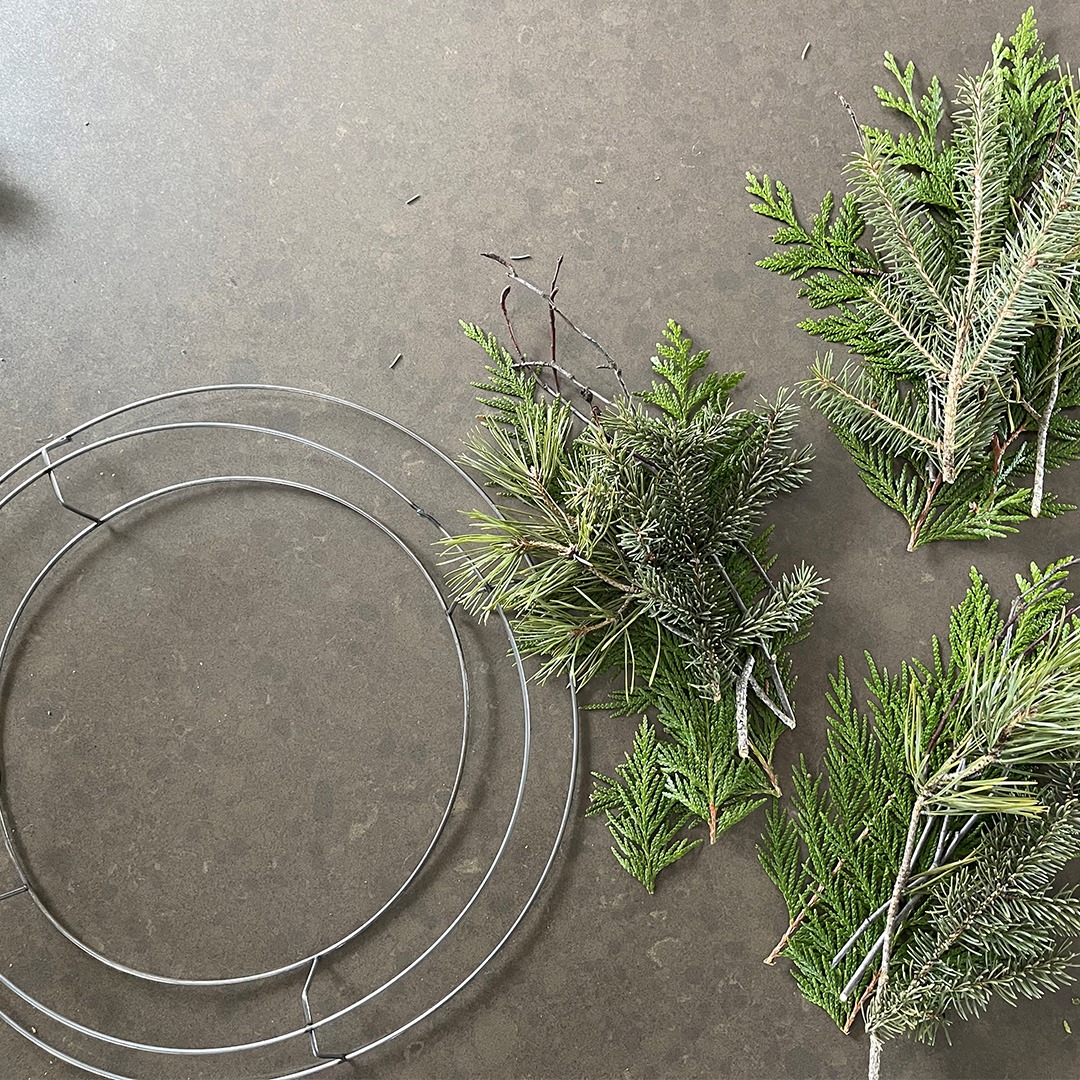
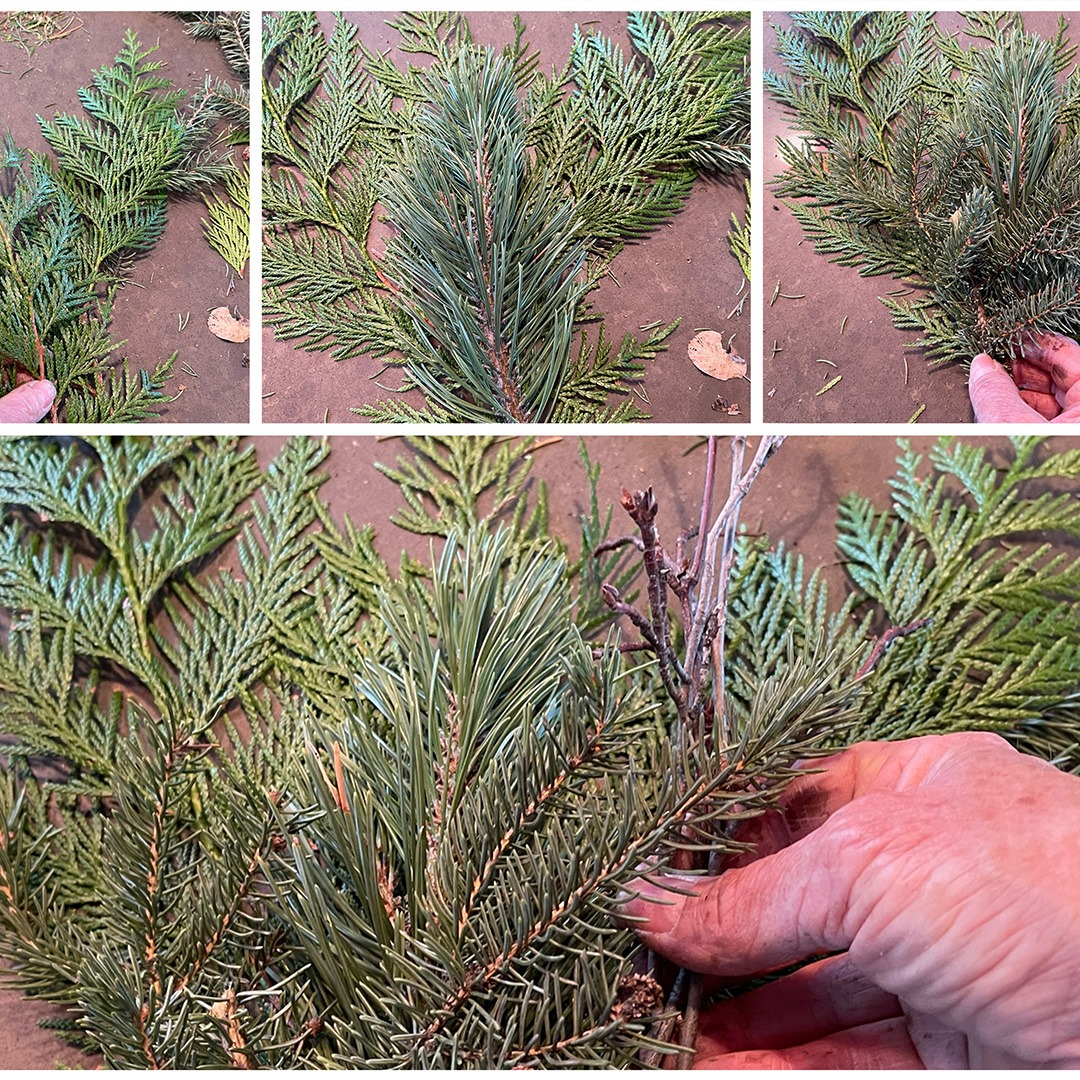
Step 3: Make individual greenery bundles. I started with cedar branches on the bottom because it lays flat and then I arranged the pine, fir, and Saskatoon branches on top as their shapes allowed.
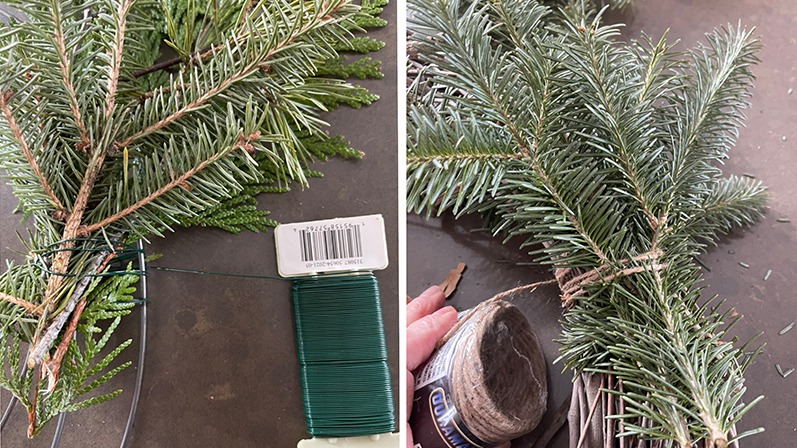
Step 4: Lay the first bunch diagonally to the right across the wreath frame pointing to the outer edge and attach it by wrapping the paddle wire or jute around the bottom 1/3 of the bunch and the frame 3 times and pull your securing material tightly.
Don’t weave the wire through the wreath frame; loop it around the whole thing.
Always end with the paddle wire or jute underneath and lying outside of the frame.
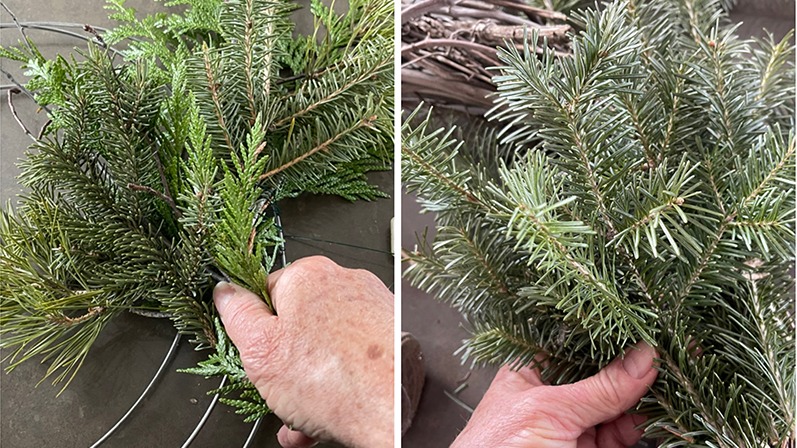
Step 5: Angle the next bunch diagonally to the left, covering the wire of the first bunch. Wrap the bottom 1/3 of the bunch 3 times with the paddle wire or jute and remember to pull it tight.
A side note about the bundles – I tend to make the inside ones slightly smaller than the outer bunches.
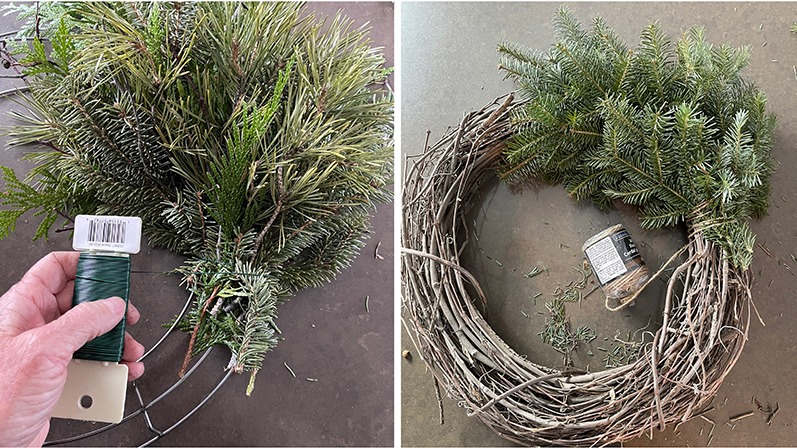
Step 6: Continue layering the bundles, alternating right, left, right, left and securing with the same 3 wraps and pulling tight, until the wreath frame is complete.
Step 7: Tie the wire or jute off at the back, leaving a loop to hang the wreath, if you wish, or a loop can be added separately.
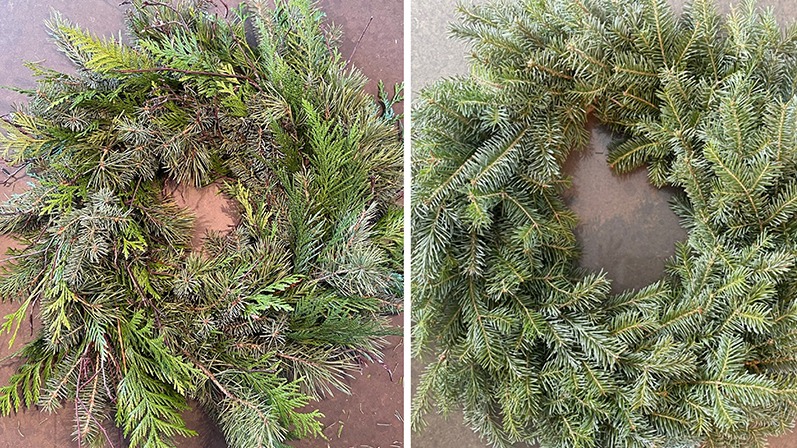
Step 8: Step back from your wreath to get a good look and trim off outlying branches or add branches to fill in spots that need more bulk.
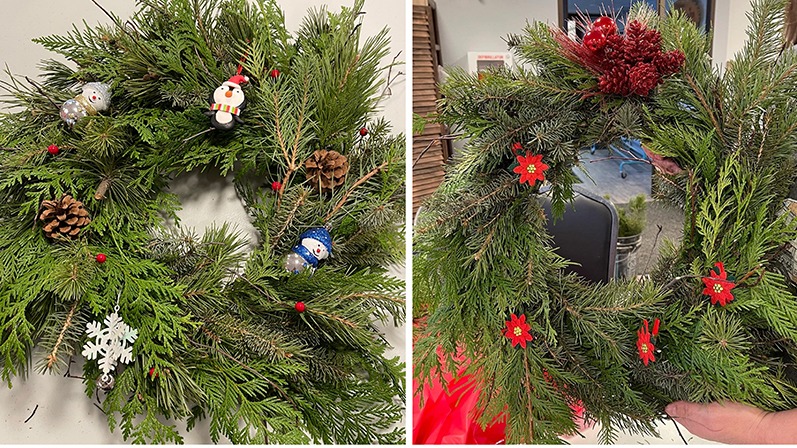
Step 9: If you would like, add decorations to the wreath.
Step 10: Hang your wreath and enjoy! Wreaths look great anywhere: along fences, on posts or pillars, on doors, above fireplaces, in entryways, and in front of windows, to name a few places.
How to Keep Fresh Wreaths Looking Great
How long fresh evergreen wreaths last depends on where they are displayed; fresh greenery lasts longer outdoors in cool weather than indoors where it is warm.
Outdoor wreaths need no care in locations where the temperatures stay below freezing and can last for months, but they will need regular misting if the temperatures are mild and above freezing.
Fresh wreaths kept indoors need more care, as detailed in my blog, How to Select, Use, and Care for Live Christmas Greenery.
Give This Project a Try!

When I first tried making my own wreath, I was afraid that it would be out of my league, but it was simple and it went smoothly.
The most involved part was collecting and harvesting the greens; and because the materials were so fresh, it lasted for months.
Wishing you and yours the best during this festive season!
©Sharon Wallish Murphy ©Gardening with Sharon


